I thought I would start a running thread on 3D printers here. Especially that I had a few question and I am new to this myself.
I thought this is a good area for it, because it seems like there are a lot of accessories that people design and make for reloading. From press modifications, to reloading blocks and other gadgets…
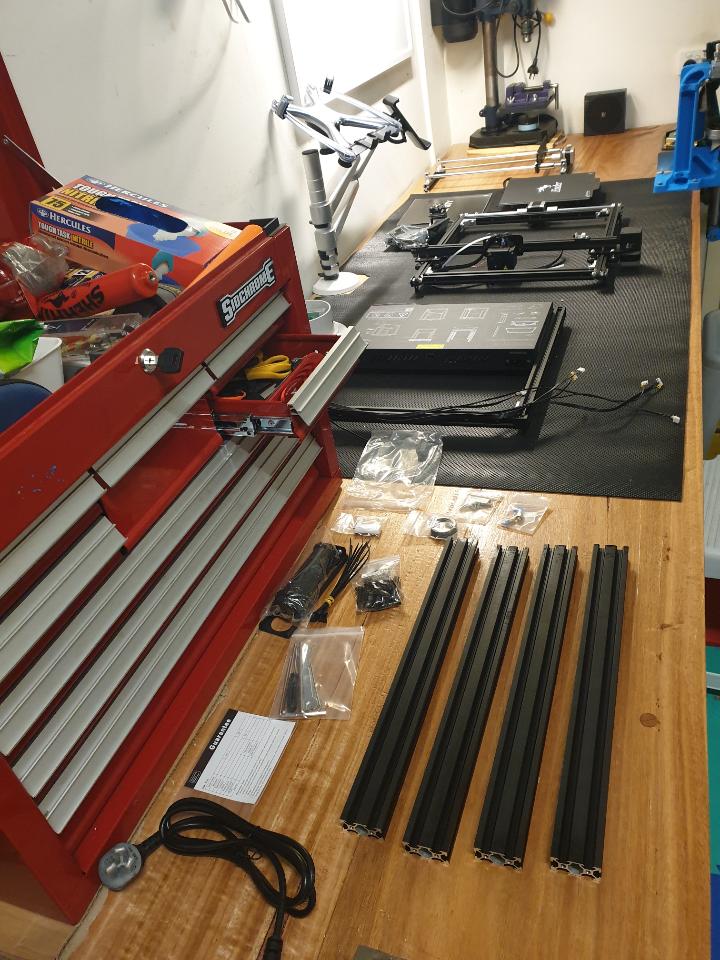
I’ve ordered one last week, but have spent a considerable amount of time researching models. For those who are interested, I ordered Creality Ender-5. However, I also ordered a few other bits and pieces that I will use to change the firmware immediately.
For starters, I thought I’d share this video, that discusses types of 3D:
The 3d printer definitely comes in handy around the reloading bench. I’ve made up a few bits and pieces for my different presses. If my printer was a little bigger I’d also attempt the DIY bullet feeder for the Dillon.
Software wise, Simplify3D is the best slicer (app that converts a 3d drawing into the code you send to the printer)
Autodesk Fusion 3D is a fantastic app for designing components. Thankfully they have a free hobbyist version. You just have to renew it every year. It’s quite easy to use.
If everything goes well, maybe I will even snag Ender-3 (older model) cheap cheap to have different setups, like tool heads First I need to learn a bunch of stuff, but thankfully few guys at work are right into it, so shouldn’t be too hard to get a rolling start.
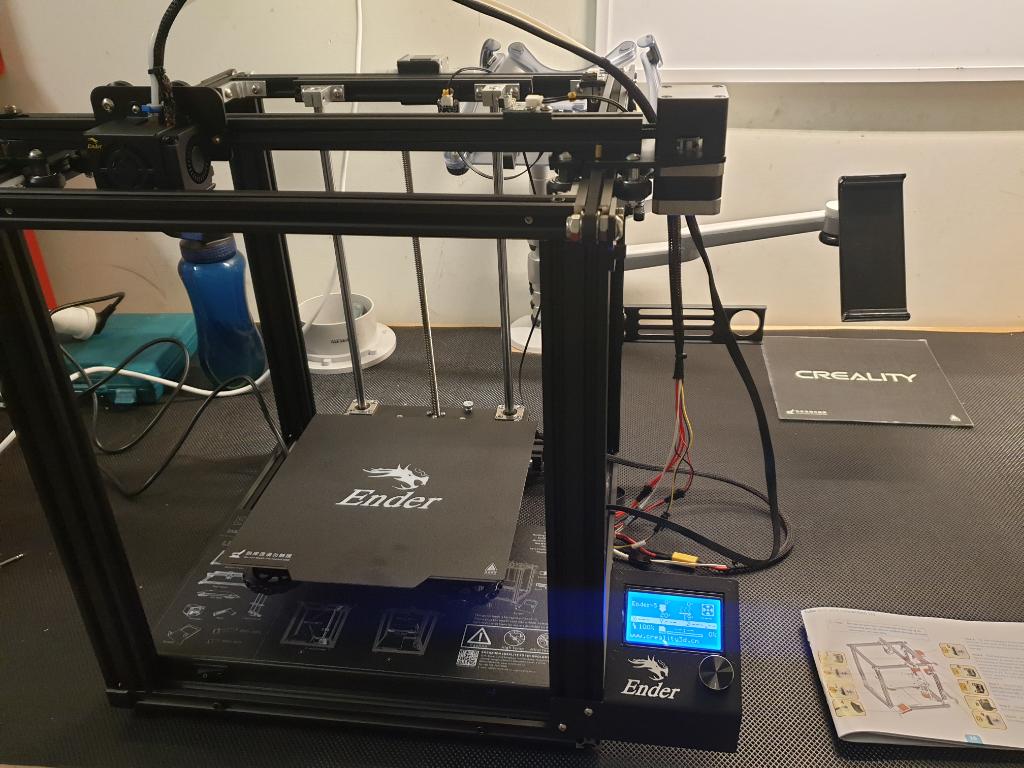
Progress. Wiring done. Seems to turn on. That’s a big plus. Can’t say it was hard tbh, compared to wiring an old school desktop from scratch. Still needs a clean up with some ties, but for now keeping it lose because I’ll be modifying it after the functional test print.
…and test print (whatever was on factory SD card is running):
It’s a bed, but not spare. It’s a different bed. Pplysomethingorother. Releases prints when cools. Yet to test. Current bed has a flexible magnet surface, so you just flex it and pop the print off. One in the background should just release the print with cooling.
You’re funny now, but you won’t be laughing when I exclude you from my infinite number of butt plugs in all manner of shapes, sizes and stimulation levels gift list. You’ll be the od one out. Sad and alone. That’s right!

 First I need to learn a bunch of stuff, but thankfully few guys at work are right into it, so shouldn’t be too hard to get a rolling start.